Wednesday 12 November 2014

Creating deeper meaning with BookTrack

I would highly recommend www.booktrackclassroom.com.

This is a free website which allows reading/creation of books to selected music/sounds.

I have started using this with one class and now it's spread like wildfire throughout the school.

I was working with one year 3/4 class that had already created their own class story together and so we copied and pasted it into Booktrack and just had to add sounds.  We are yet to finish adding all the sound effects to this story, but I thought I would give you a snippet.

What I really like about this is it gets children thinking about the composition of the story.  In this attached brief example of a start of a story, you will see the children had to really think about what the personality of the characters they had created were like and choose which music best fit their characters.  It really brought the characters alive for them.  It will be interesting to see how through music the characters develop as the story goes on.


I have now created a competition amongst classes, with a specific voting criteria.  After reading a book you can vote on how many stars.  The book with the highest score will go on our school website.  Looking forward to seeing the result.

Friday 7 November 2014

Worksheets vs Student Led in Maths today

Today I had the privilege of having to step into a classroom (year 3) to cover a for a teacher who had had to leave for an emergency.   The teacher had left some maths worksheets behind.

I must admit the thought of giving out these maths worksheets to the children made me cringe.  Boring was the only word that came to mind!

It was a Friday and I knew this class were a challenge. So I decided to take a risk and do something more student driven .

The results were incredible, so I wanted to share:

First of all I talked about how we were going to do student led maths today which meant they were going to drive the maths.  This captured their curiousity immediately.

I asked the class to come up with some maths problems.  After talking with their neighbour quickly, they started sharing some of the problems they came up with (see photo below).


Displaying photo.JPG

Then I explained that were were going to use a dice today and we needed to come up with six different ways they liked to solve problems.

They initially came up with these:

1.  Draw a picture
2.  Talk the solution through
3. Write the solving process in a book
4. Using maths equipment (no calcs)

I asked them to think about how could we use the Chromebooks and iPads we had in the classroom and the following were added to the list:
5. Video solving the problem iPad/create a Google Presentation on Chromebooks
6. Multi choice select from 1-5

I asked them how long they thought it would take to solve each problem, and we settled on a 5 minute time frame for each problem.

We talked about how many we should have in a group to work these problems out and the students felt it was better to have two in a group, otherwise anymore then there's always one person who doesn't do anything.

So they grouped themselves into pairs and selected one of the problems from the board they wanted to start with (they could complete them in the order they chose).  Armed with a dice they rolled the dice and then had to solve this problem using the method corresponding to the dice number.  So a 1 would be "draw a picture" etc.

I encouraged the children to capture their learning by photos or video if they were using materials or drawing a picture.

So after an hour of maths, what did I learn about this class:

I learnt
- this class were clearly used to working with Word problems because they could articulate word problems so quickly
- from the word problems they came up with I learnt that two thirds of the class loved collecting rocks
- they particularly enjoyed videoing and seeing it played back
- every single student was completely engaged
- the more difficult students were completely on task and well behaved
- they preferred working in pairs to larger groups
- they loved sharing the way they solved their problems with the class
- they loved having choice
- they had so much fun
- students were empowered to learn

Now I wonder if I would have learnt so much about the class if I'd given them a worksheet and I wonder how engaged these students would have been?

Sunday 2 November 2014

Tinkering at the Mind Lab with a bit of MLE and Reverse thinking thrown in

Today at the Mind Lab we were introduced to tinkering.

First of all we created Wobble Bots and then Scribble Bots.  Watch the video to find out how!

Wouldn't this make fantastic procedural writing!

Children should engage in tinkering and making because they are powerful ways to learn.
(www.Inventtolearn.com) A must read here is the book Invent to Learn: Making, Tinkering and Engineering in the Clasroom by Sylvia Libow Martinez and Gary S. Stager

Essential learning goes beyond books and theoretical "what ifs." When students design, build, iterate, and revise their creations, they learn important life lessons about empathy, creativity, grit, failure, and success.  

Piaget’s constructivist theory talks about knowledge being a consequence of experience. As teachers we all know that children learn best by doing. Seymour Papert added to Piagets constructivist theory and took it a step further towards action. He defined this theory as constructionism and is considered the founder of the maker movement. Papert extended Piagets constructivist theory adding manipulative materials to the idea that learning is most effective when part of an activity the learner experiences is constructing a meaningful product. This theory is really at the heart of the maker space movement and in understanding the potential for learning through a maker space. Although the learning happens inside the learner's head, it happens most reliably when the learner is engaged in a personally meaningful activity that makes the learning real and shareable. Construction that may be shared could be as simple as a poem or a game created. John Dewey was an advocate for hands on learning, however it is important to note though that constructionism is more than just about hand’s on learning. The most meaningful part is about the questions asked as part of the process. The resultant product might stem from such a question like ‘how can we make this product go faster?” Constructionism empowers learners to connect with everything they know, feel, and wonder, stretching themselves into learning new things. http://www.edutopia.org/blog/maker-movement-shoulders-of-giants-sylvia-martinez?utm_source=twitter&utm_medium=post&utm_campaign=blog-maker-movement-shoulders-giants

Reverse Thinking

After our tinkering we talked about Modern Learning Environments and brainstormed traditional environments compared to MLE's.  Chris Clay then introduced the concept of Reverse thinking and we had to choose one component from the MLE brainstorm and then think about it in reverse.  Reverse thinking helped us to clarify exactly what a MLE is.  I tried this in the classroom when I took a group of children who were creating an e-book.  We tried reverse thinking to brainstorm what an e-book was NOT and this really did help clarify what an e-book was.  Try it!

Wednesday 29 October 2014

3D Modelling using Tinkercad and Sculptris

Today at the Mind Lab we looked at TinkerCad.com.

It is free to sign up and it allows the creation of 3D models.  I can see how this would be great for teaching about properties of shape, angles, actual 3D models, spatial awareness etc.  You can export the file as an .obj or a .stl and print these out on a 3D printer.  When you add the shape to the 'plane' you can view this object in all directions, resize etc.  There are rulers to help with measurements.  Great for geometry, angles, measurement etc.  

Here is an example of a peg and the beginning of a name plate.  To get the 'holes' in the shape, you create the shape you want for the hole, put it over the first shape and then click on 'hide' then group both shapes together and the 'hidden' shape makes the hole.


We also looked at software called Sculptris by Pixilogic.  This is free software and is 3D modelling with 'clay' in effect.

It is really easy to use and I could see how this could be used to create characters in narratives, or even worlds, planets, mountains etc.

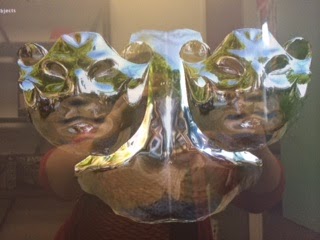
Here are a few pictures from my result of playing, the original shape being a sphere.


Sunday 24 August 2014

Scratch it up a level or two (Mind Lab: Session 4)

I am currently completing the Post Graduate Certificate in Applied Practice (Collaborative Digital Learning) through the Mind Lab and Unitec. For the first sixteen weeks I spend four hours at the Mind Lab with about 30 other amazing educators from early childhood through to tertiary education (there's approx 100 of us altogether).

This blog post is a snippet about our fourth session at The Mind Lab, where we looked at coding using Scratch.  For anyone unfamilar with the concept of coding, coding is essentially creating a set of instructions that makes something do something.  Scratch makes code easy to use by presenting code in 'jigsaw' like pieces color coded into different areas of actions.

Scratch (http://scratch.mit.edu/) is a free website for children to learn how to code. There is also an iPad app available and now a Scratch Junior as well.

You can create new Scratch projects without signing up, however signing up allows you to save and share your code projects.

In this session we were encouraged to 'discover' how to use Scratch through experimentation.  We ended up choosing what are called 'Sprites' (characters) and playing with the different types of code which were colour coded by motion, looks, sound etc.

For example in the photo below we had selected the 'cat sprite' and then in the 'jigsaw' type code, you can see we chose an event (orange) that said when a key is pressed, then in purple is the sound code which will make a certain sound play, then the blue code is to do with a motion that the 'sprite' will do.

We ended up making the Octopus change colours, the cat dance around the screen and the lady circle around and make a clone of herself.

We added further code which meant that when a 1, 2, 3 or 4  was pressed, the type of instrument changed and the costume (which was colours of the sprite).

We had a lot of fun experimenting and could see how easy it would be for children to create code using the 'jigsaw' type pieces.

Scratch can be used to create games and by going online to the Scratch website you can find games that have been created in Scratch and then look at the code so see how it was done, so you can deconstruct the code and learn from it.


Then we were introduced to a 'makeymakey' card which is essentially a computer chip with a bunch of wires to create a circuit.  We had to choose from a range of conductive materials to connect the wires to and we chose playdough (as shown below)


You could plug a wire on the makeymakey board into the slot which was the equivalent of the  'a' of a keyboard and then plug the other end of the wire into the playdough.  We repeated this for each letter of the keyboard located on the makeymakey board.  We had to make sure we had an 'earthing' wire which was plugged into the yellow playdough on the right hand side of the photo.


So in effect, what we were then able to do was tap on the playdough, (whilst touching the earthing playdough) to activate our code in Scratch which made our Sprites do the actions we'd coded them to do and the sounds play too.  Here is a short video clip to show you the end result.


Makeymakey kits can be bought through www.mindkits.co.nz for about $75 plus postage.  This is a local company in West Auckland.

I'm really looking forward to trying this out with children at school!